I think we all have our stories and reasons for “tack Hoarding” – a reminder of a wonderful horse or that day we won that Blue Ribbon. I truly believe there is something emotional connecting us to that spur that we lost the mate to or the bit that doesn’t fit any horse you currently own. Some of us think that we will find a use for the item or fear that they will be hard to replace from a monetary standpoint. We have good intentions and truly believe we are going to have a use for them someday but then there is always that moment of truth. Whatever your reasons, (personally, I was fearful I would soon wind up on an Equestrian episode of Hoarders !) As an Interior Designer I decided the easiest way to keep some of this tack was to find a way to incorporate these sweet memories into my décor.
Stirrup Irons
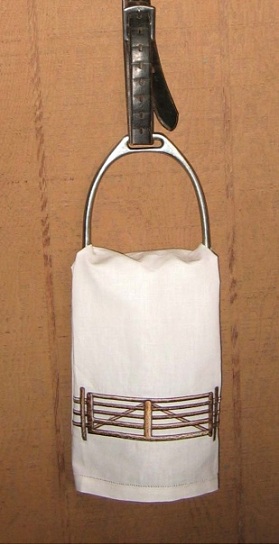
How to make a towel holder from an old stirrup iron and leather
This simple towel holder will look great in a bathroom, kitchen or tack room. Begin by gathering your materials: a traditional fillis iron and stirrup leather, leather hole punch, goggles (for eye protection when using a drill—safety first!), drill and bits, hammer, and a wall anchor, toggle bolt or molly if needed (available at hardware stores).
Clean your stirrup and leather and remove the stirrup tread. Decide what length of leather you need, and buckle the leather to make it the right length. Next, decide where you will attach the leather to the wall, and punch a hole in the leather so it will hang at the appropriate length when attached to the wall at that hole. Cut any excess leather with a utility knife. (Or, take it to a local shoe repair shop).
Now find a stud in the wall, either with a stud finder or by tapping on the wall and finding the point where the sound changes from hollow to ‘solid’. Wall studs are generally placed about 16 inches apart. If there isn’t a stud where you plan to hang the stirrup, use a wall anchor, toggle bolt or molly to ensure that the towel holder won’t pull out from the wall.
Using the drill, attach the leather with a screw (and molly if needed) through the hole you punched.
Hang a pretty hand towel from the stirrup and admire your work!
Stirrup Iron Soap Dish
The following two ideas may take being somewhat adventuresome but trust me, the result will make it all worth it !
First, research a local stone fabricator in your area. A fabricator makes the template and cuts the stone for granite, marble or stone countertops. Once you’ve located one, pay them a visit and ask them (very sweetly of course, or bringing them some cookies definitely helps!) and ask them if you can do some “Dumpster Diving” for their left over chunks of stone that have accumulated from their recent projects.(I warned you this project takes being somewhat adventuresome) All fabricators have dumpsters filled with
pieces that have broken off during the cutting process. If you are really nice they might ask them if they would finish off the edges of the pieces you find in the dumpster for this project.
But even if they don’t, the broken chunks will give an interesting rough quality to your piece. Make sure you bring the stirrup iron with you and try to find pieces of marble, or granite that will fit your iron.
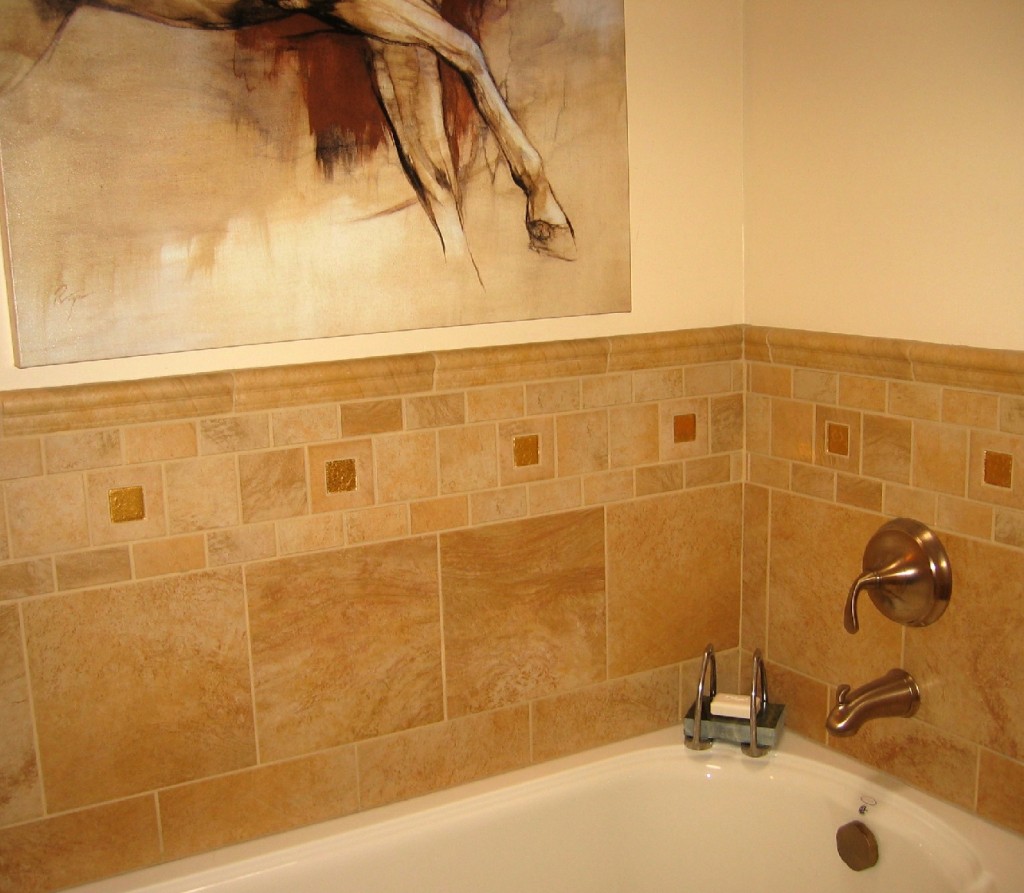
For the Soap Dish just take the 2 stirrup irons and silicone onto the piece of marble or granite. Add some pretty soap and you are done! Remember to let the silicone dry for 24 hours before use.
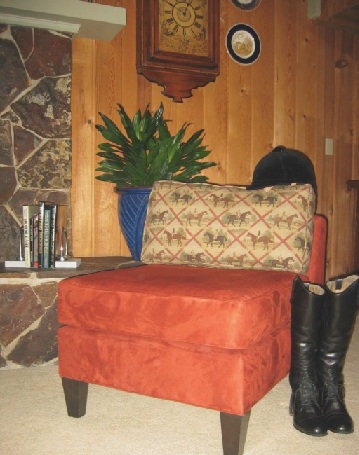
For the Bookends take 2 chunks of stone and silicone the stirrup iron towards the inside of the stone piece. Put some of the many, many “How to Ride Better” books you own in between them and you are set ! The hardest part of these projects are getting the granite/marble remnants. Who knows you might learn something new and possibly make a new
Desk Mail Organizer
If you’re like me, your mail has a mind of it’s own and winds up in the craziest places ….like not in our house but in my car. So this simple Stirrup Organizer may help keep it together. Take another piece of slab granite or marble and silicone your stirrup irons on each side (dependent on the width of your stone remnant) and that’s all it took to get you a little more organized – and to make another use for your old stirrup irons.
Bit Scarf Holder
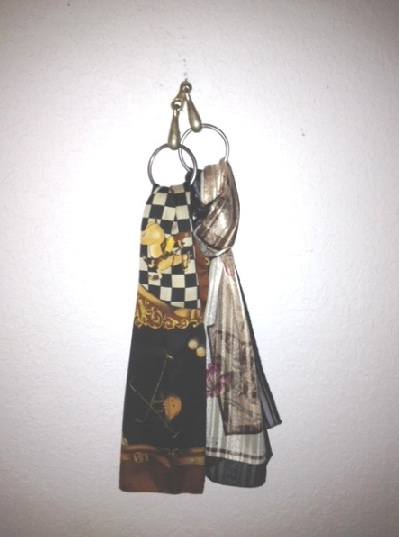
Jointed snaffle bits work best. For example, a French link loose ring, a jointed loose ring or D-ring. Large rings allow you to hang the scarves; while the French link or jointed bits let you hook the bit over a nail or screw. The trickiest step is to decide where you will hang the bit (or bits) so that the length of the scarves fill the visual space. A grouping of three bits looks especially nice.
Use a long nail driven at an angle to hang the bit. Ideally find a stud and drive the nail into the stud. If there isn’t a stud in your chosen spot, you might want to use a screw and/or molly to secure the bit to the wall. Hang scarves in complementary or contrasting colors, knotting or looping them through the rings.
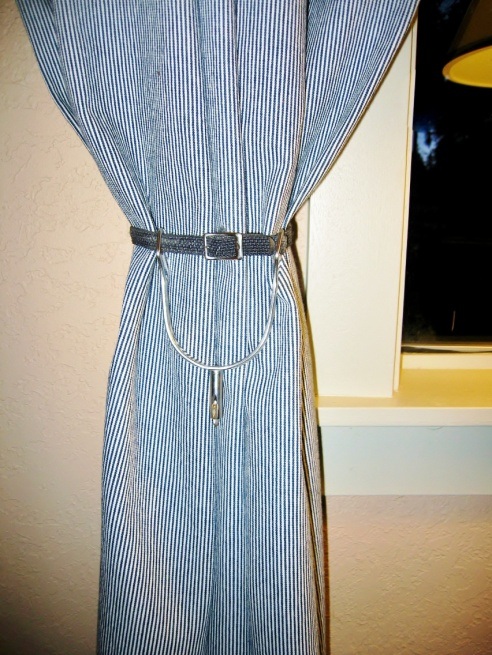
Turning a pair of spurs into drapery tiebacks takes only
How to use spurs as drapery tiebacks
Spurs make great curtain tiebacks and are a subtle way to add an equestrian touch to your decor. Use a spur and either a spur strap (clean it first!) or a pretty ribbon that coordinates with the drapery fabric.
Simply buckle the spur strap or tie the ribbon around the drapery as shown in the photo. Voila!
So take a new look at what’s in those trunks, storage bins, and plastic tubs. Are you ready give your beloved tack a new life. Pull out a favorite piece and think about how it might be used for a different purpose to bring your love of horses home! Now, don’t you feel better? Don’t get rid of all that tack – embrace it! Each project is easy and not very time consuming so you’ll still have plenty of time to ride…..or ……maybe visit your favorite tack shop for their sale!
Mary Cox & Fatima
Mary Cox is a Seattle based Interior Designer with a passion for color and design. www.alittleaccent.biz She is a member of the NWSID (Northwest Society of Interior Designers), has written numerous design articles for magazines and newspapers. Her other lifelong passion has been horses. She has ridden and competed in Hunter- Jumper competitions since she was a child and in the past 10 years has turned her interest to Dressage. Mary recently launched a classic equestrian home decor line Horse of a Different Color @ www.equestrian-interiors.com.




This is one of the BEST blog posts I have seen on Eq. Stylist! In an age where almost nothing is original in the blog world, these ideas are a first for me, and I adore them. I cannot wait to do the towel holder in the guest room! (I would think maybe a bit snapped on both sides to the wall could work as a TP holder?! You’ve got my gears turning!) 🙂
I adore the resourcefulness of the designer. Turning old things into new and usefull things are truly very admirable.
Wow I have been looking for ages for a page like this !!! Do u have any idears for reains ??
Hi, thanks for great ideas! I m about to decorate my studio, and i have so many equestrian little things around, so you gave me food for thoughts 😉
Another idea is to use horse bits for drapery tiebacks.
Again, thanks for the article 🙂